iOS Notification Images
Displaying an image in an iOS notification.
This is a quick guide to display an image in an incoming notification. Android handles this out of the box so this extra setup is only necessary for iOS.
If you want to know more about the specifics of this setup read the official Firebase docs.
🚨 Before you start Be sure you already have Cloud Messaging installed and set up. In case you don't get started here.
🏁 Ready to start The following steps will guide you through how to add a new target to your application to support payloads with an image. Open Xcode and let's get started.
Step 1 - Add a notification service extension
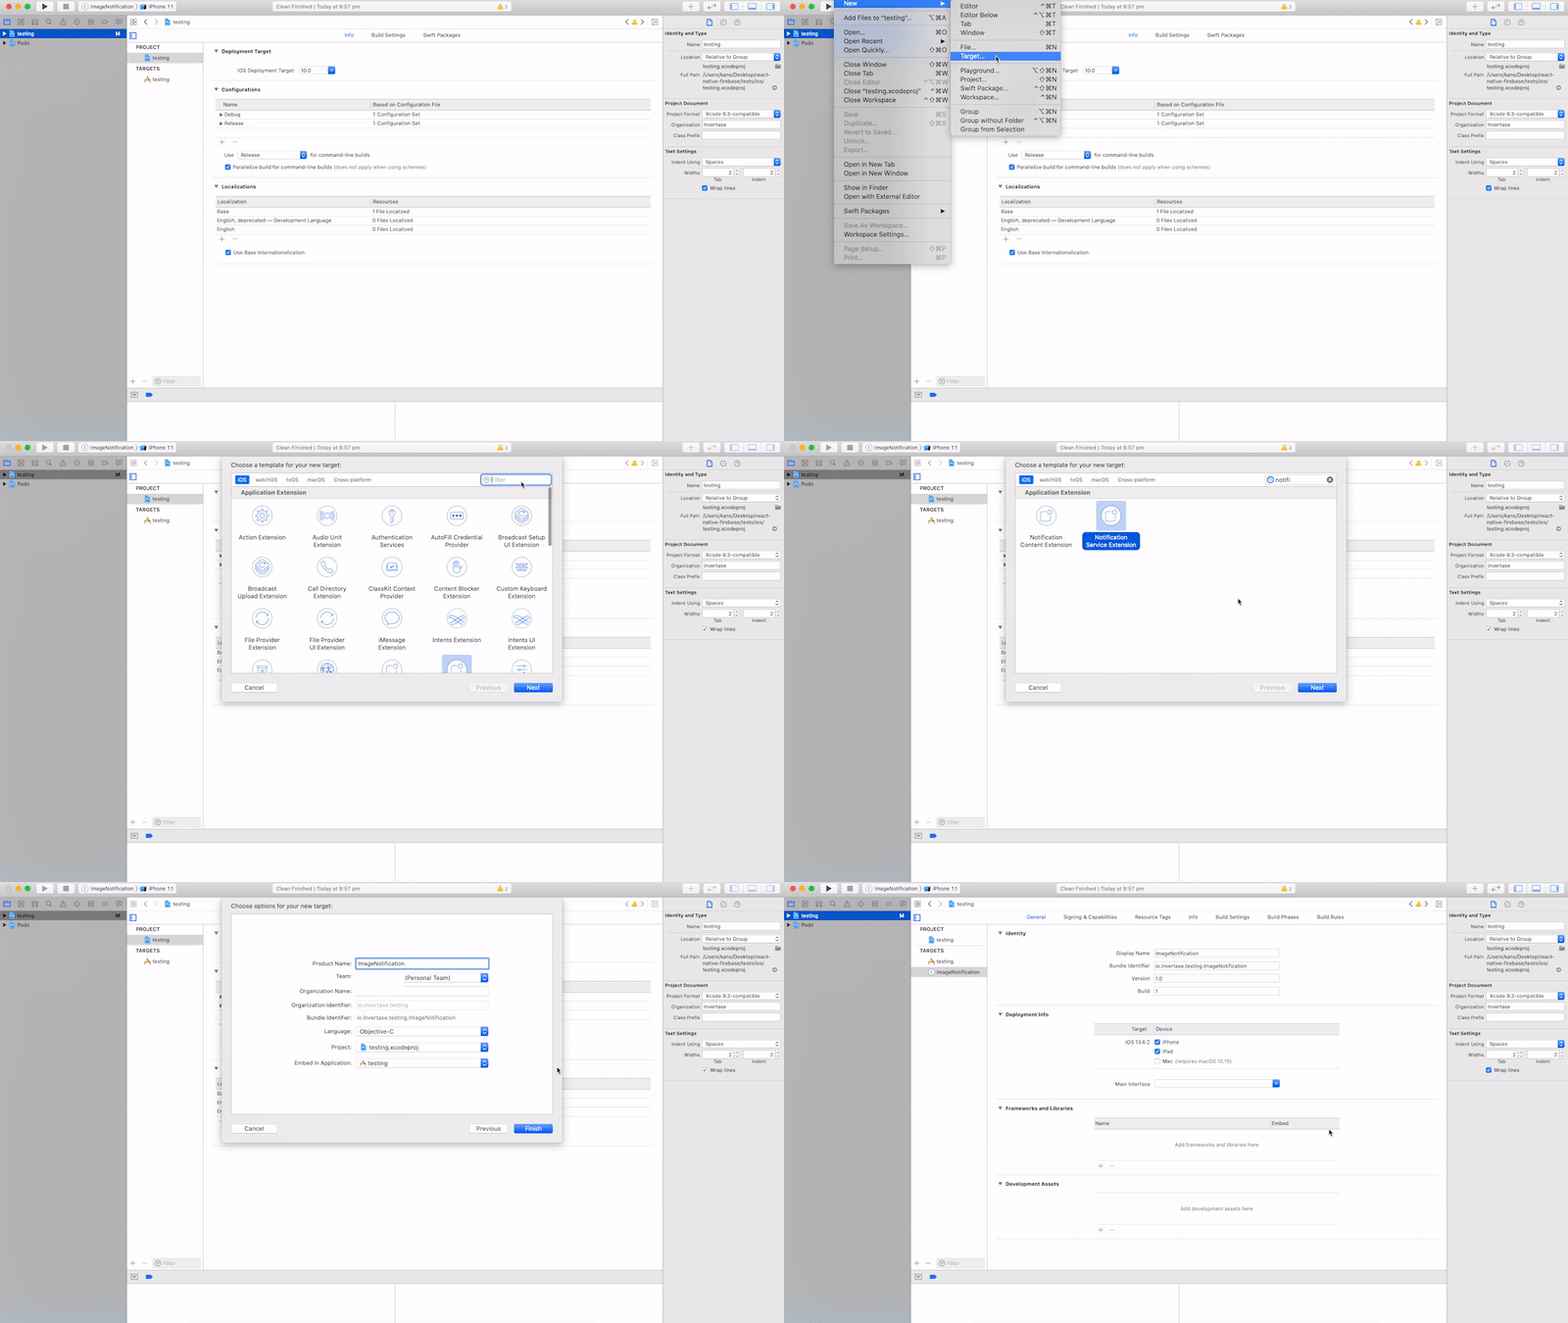
- From Xcode top menu go to: File > New > Target...
- A modal will present a list of possible targets, scroll down or use the filter to select
Notification Service Extension. Press Next. - Add a product name (use
ImageNotificationto follow along) and click Finish - Enable the scheme by clicking Activate

Step 2 - Add target to the Podfile
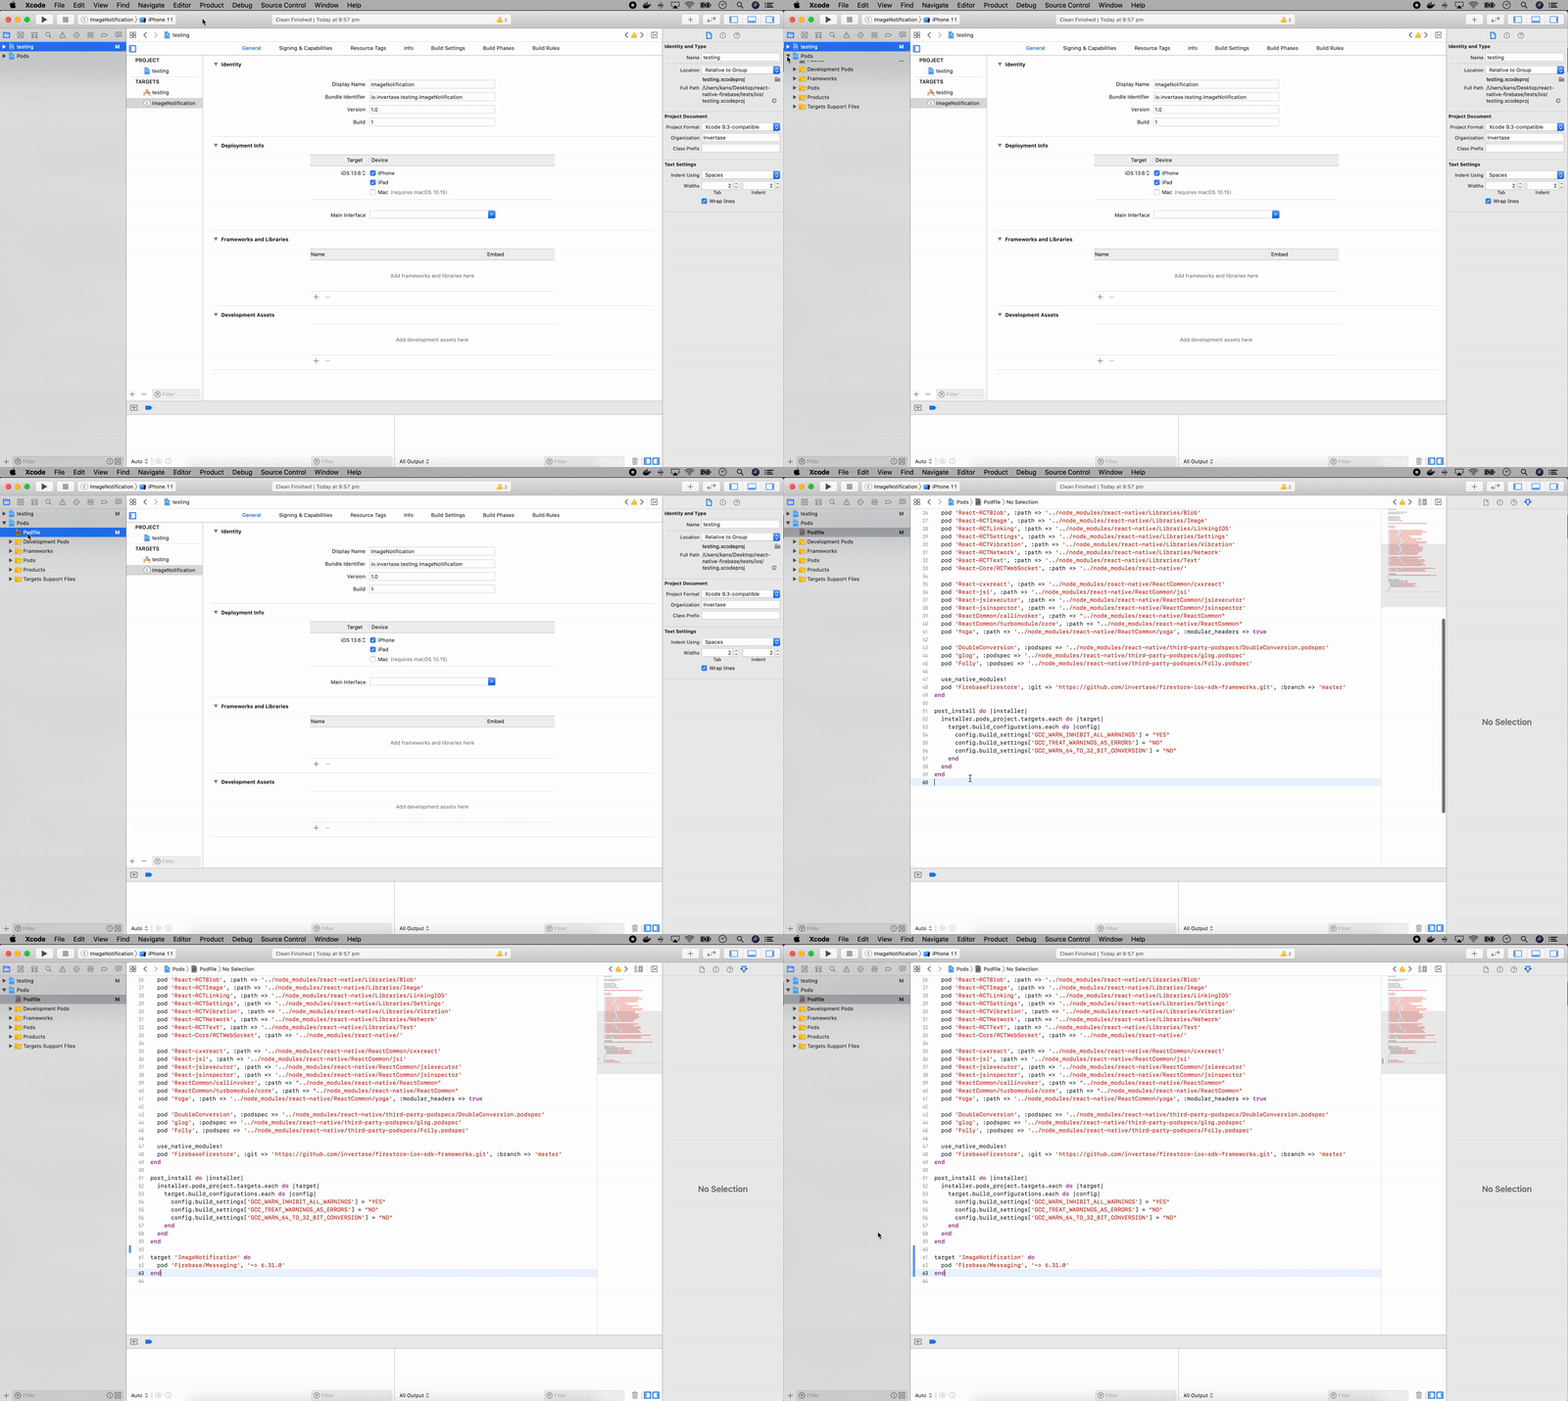
Ensure that your new extension has access to Firebase/Messaging pod by adding it in the Podfile:
- From the Navigator open the Podfile: Pods > Podfile
- Scroll down to the bottom of the file and add
target 'ImageNotification' do
  use_frameworks! :linkage => :static
  pod 'Firebase/Messaging'
end
- Install or update your pods using
pod installfrom theiosfolder

Step 3 - Use the extension helper (Objective-C)
If you selected to create your extension as a Swift project, jump to the next section.
At this point everything should still be running normally. This is the final step which is invoking the extension helper.
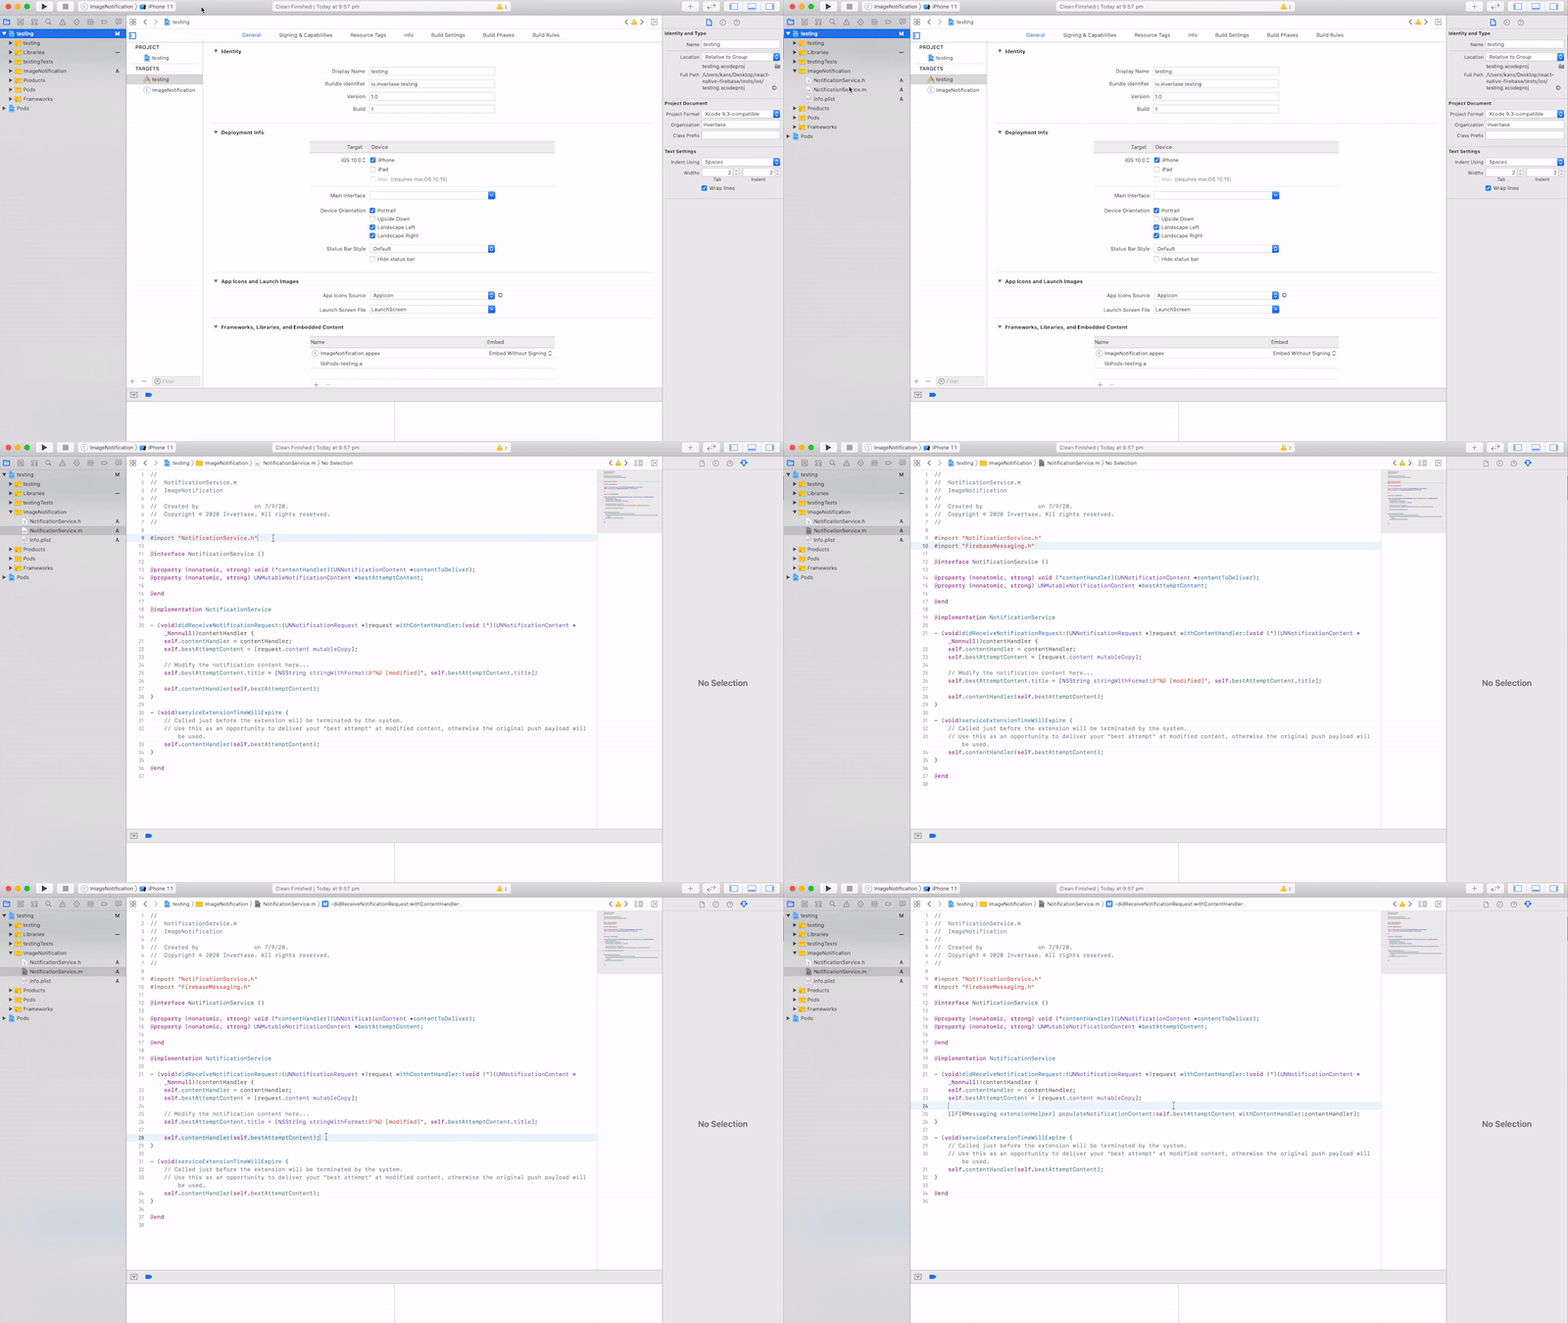
- From the navigator select your
ImageNotificationextension - Open the
NotificationService.mfile - At the top of the file import
FirebaseMessaging.hright after theNotificationService.has shown below
#import "NotificationService.h"
+ #import "FirebaseMessaging.h"
- then replace everything from line 25 to 28 with the extension helper
- // Modify the notification content here...
- self.bestAttemptContent.title = [NSString stringWithFormat:@"%@ [modified]", self.bestAttemptContent.title];

- self.contentHandler(self.bestAttemptContent);
+ [[FIRMessaging extensionHelper] populateNotificationContent:self.bestAttemptContent withContentHandler:contentHandler];

Step 3 - Use the extension helper (Swift)
At this point everything should still be running normally. This is the final step which is invoking the extension helper.
- From the navigator select your
ImageNotificationextension - Open the
NotificationService.swiftfile - At the top of the file import
Firebaseright after theNotificationServiceas shown below
import UserNotifications
+ import Firebase

class NotificationService: UNNotificationServiceExtension {
- then replace everything from line 19 to 23 with the extension helper
        if let bestAttemptContent = bestAttemptContent {
-            // Modify the notification content here...
-            bestAttemptContent.title = "\(bestAttemptContent.title) [modified]"
-
-            contentHandler(bestAttemptContent)
+            Messaging.serviceExtension()
+               .populateNotificationContent(bestAttemptContent, withContentHandler: contentHandler)
        }
All done
Run the app and check it builds successfully – make sure you have the correct target selected. Now you can use the Notifications composer to test sending notifications with an image (300KB max size). You can also create custom notifications via FCM HTTP or firebase-admin. Read this page to send messages from a server.
